
-
×
 CONED - STRAWBERRY SHORTCAKE
1 × $30.00
CONED - STRAWBERRY SHORTCAKE
1 × $30.00
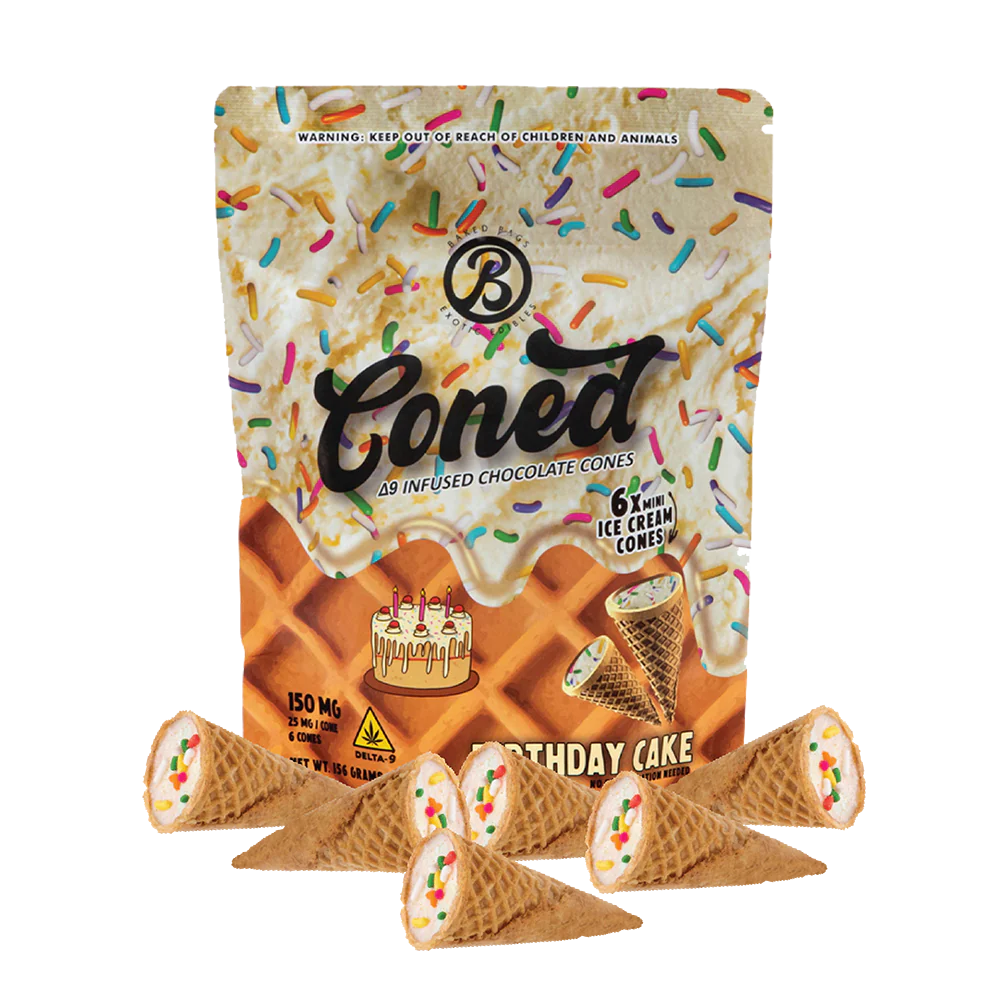


CONED – BIRTHDAY CAKE
To create a CONED – BIRTHDAY CAKE that resembles an ice cream coned, we can draw from various recipes and techniques available in the sources provided. Here’s a detailed step-by-step guide to making an ice cream cone-themed birthday cake.
Step 1: Gather Ingredients of CONED – BIRTHDAY CAKE
For the cake, you will need:
- Cake Mix: You can use a standard yellow cake mix (like the one mentioned in the AllRecipes source) or any flavor of your choice.
- Ice Cream Cones: Flat-bottomed ice cream cones are essential for this design.
- Frosting: Buttercream frosting is commonly used. You can make it from scratch or use store-bought frosting.
- Decorations: Chocolate chips, colored candy sprinkles, and any other decorative items you prefer (such as whipped cream or fruit).
Step 2: Prepare the Cake Batter of CONED – BIRTHDAY CAKE
- Mix the Cake Batter: Follow the instructions on your cake mix package. Typically, this involves combining the dry mix with eggs, water, and oil.
- Fill Ice Cream Cones: Pour thein batter into each flat-bottomed ice cream cone until they are about three-quarters full (up to the first ridge of the cone). This ensures that there is enough room for rising without overflowing.
Step 3: Bake the Cakes of CONED – BIRTHDAY CAKE
- Preheat Oven: Set your oven to 400 degrees F (205 degrees C).
- Bake Cones: Place the filled cones upright in a cupcake pan or on a cookie sheet to keep them stable while baking. Bake for approximately 15 to 18 minutes or until a toothpick inserted into the center comes out clean.
Step 4: Cool and Decorate of CONED – BIRTHDAY CAKE
- Cool Down: Allow the baked cones to cool completely after removing them from the oven.
- Add Toppings:
- While still warm, place about 10 chocolate chips on top of each cone. The heat will slightly melt them, allowing you to spread them over the top for a smooth finish.
- Decorate with colored candy sprinkles for added visual appeal.
Step 5: Assemble Your Cake
If you want to create a larger cake using multiple cones:
- Layering: Use additional cakes baked in traditional round pans as layers beneath your decorated cones.
- Frosting Layers: Apply buttercream frosting between each layer of cake and around the outside for stability and decoration.
Step 6: Final Touches
- Whipped Cream Swirls: For an extra touch, pipe stabilized whipped cream on top of each cone to mimic ice cream swirls.
- Chill Before Serving: If you’ve used whipped cream or any perishable toppings, refrigerate until ready to serve.
Be the first to review “CONED – BIRTHDAY CAKE”
Related products

coneds
$30.00
Baked Bags Coned Products Baked Bags Coned products are a line of edibles infused with Delta-9 THC, designed to provide a flavorful and enjoyable experience for consumers. Each package typically contains six mini ice cream cones, each infused with 25mg of Delta-9 THC, totaling 150mg per bag. These treats come in various flavors such as [...]
coneds
$30.00
Overview of Coned Strawberry Shortcake Edibles Coned Strawberry Shortcake edibles are a type of THC-infused treat that combines the flavors of strawberry shortcake with the effects of Delta-9 THC. Each edible is designed as a mini waffle cone filled with rich chocolate infused with Delta-9 THC, offering a unique and enjoyable experience for consumers. Product [...]
coneds
$30.00
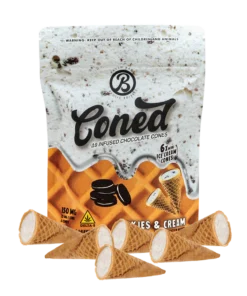
Coned – Cookies & Cream The Coned Cookies & Cream product is a unique edible treat that combines the flavors of cookies and cream with the effects of Delta-8 and Delta-9 THC. Below is a detailed breakdown of its components, effects, and legal status. Product Overview of CONED – COOKIES & CREAM The Coned Cookies & Cream [...]
coneds
$30.00
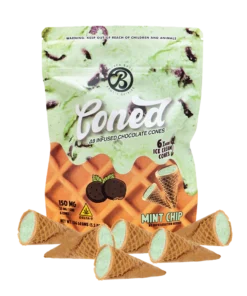
Overview of Coned – Mint Chip Edibles Coned – Mint Chip is a product offered by Baked Bags, featuring mini waffle cones filled with rich Delta-9 THC chocolate. These edibles are designed to provide a powerful head and body experience, combining the enjoyment of a classic mint chip flavor with the psychoactive effects of Delta-9 THC. [...]
Reviews
There are no reviews yet.